
A recycling crusher might look like a large piece of equipment with complex engineering. But any technical handyperson with some knowledge of electrical wiring can build a small or medium-sized DIY recycling crusher, the brain behind this can be a linear actuator. After all, this is one of the many uses of actuators around the home.
Today, we will see how to build a DIY linear actuator recycling crusher step-by-step, with actuators from firgelliauto.com. We will also look at the benefits and limitations of this installation and how you can make the most of it.
How to Make a DIY Linear Actuator Can Recycling Crusher
Before we begin, we have to say this guide assumes you have a basic understanding of electrical wiring and know-how for DIY projects .
Safety should always be your priority. So exercise caution and adhere to safety guidelines when working with electrical components.
Materials Needed
- A manual can crusher
- A linear actuator
- A 12 volt DPDT Relay
- A rail for limit switch trigger
- Limit switches
- Superglue
- Mounting hardware
- On/off switch
Step 1: Disassemble the Manual Can Crusher
The first step of this process is to dismantle the manual can crusher. Unscrew and remove every fastener that holds it together. Separate the crusher head from its base effectively.
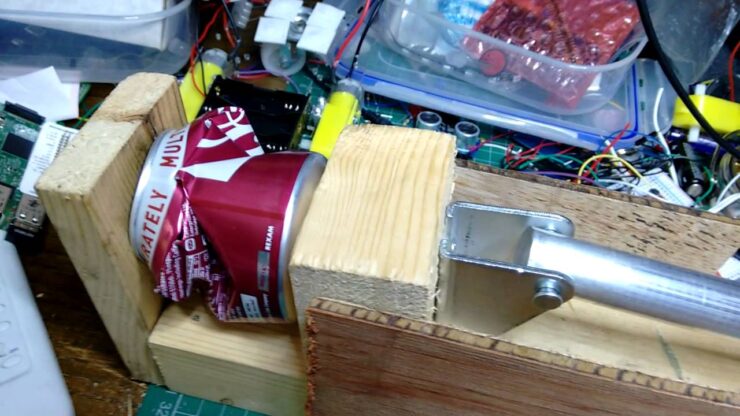
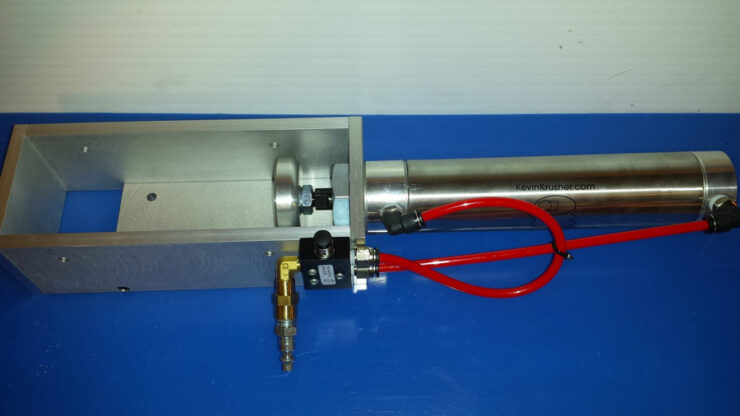
Step 2: Attach the Linear Actuator Shaft to the Crusher Head
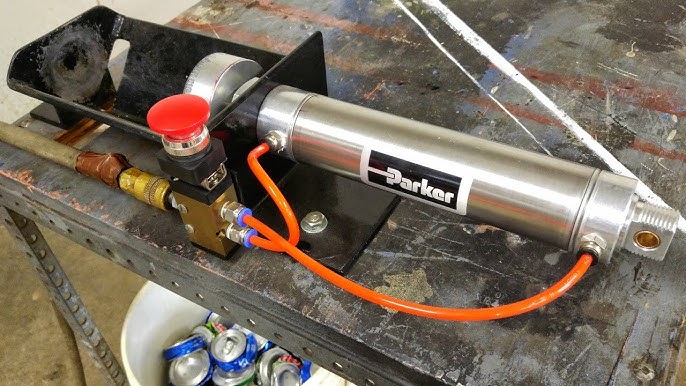
Get a classic rod linear actuator or a high- speed linear actuator. Take the shaft of the linear actuator. Secure it to the crusher head. Fasten each screw meticulously. Tighten the bond between these two components.
Step 3: Wire All Inputs of the DPDT Relay
Consult the schematic accompanying the linear actuator and DPDT Relay. Then continue by connecting the appropriate cables.
Unite the wires from the linear actuator with their corresponding inputs on the relay. This would grant the relay the power to control the actuator’s movement.
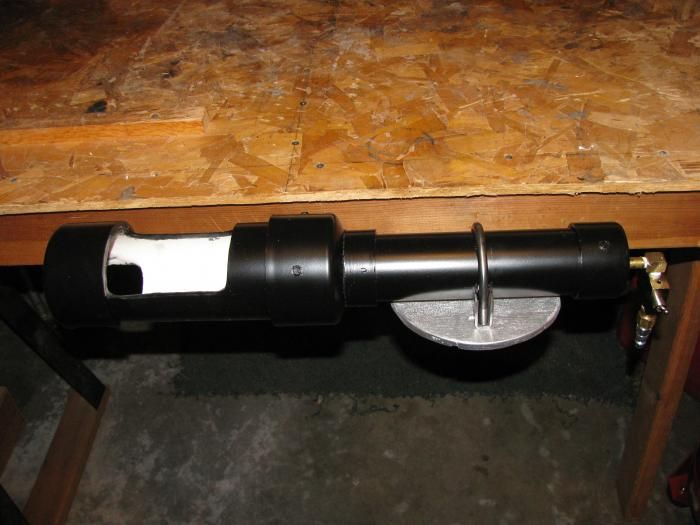
Step 4: Cut a Rail for the Limit Switch Trigger
Crafting a rail that would serve as the trigger for the limit switch demands precision and ingenuity. Get a sturdy piece of wood, measure and shape it to fit your purpose.
Step 5: Drill a Hole for the Limit Switch Trigger
Have your trusty drill in hand. Then carefully pierce the rail, aligning the hole precisely with the linear actuator’s movement.
Step 6: Attach the Limit Switches to the Rail
Take the superglue and affix the switches to opposite sides of the rail.
Step 7: Mount the Hardware
Secure the linear actuator to its chosen abode using the appropriate hardware. It sure will be a moment of triumph, seeing your creation firmly anchored in place, ready to fulfill its purpose.
Step 8: Install the On/Off Switch
To wield power over our recycling crusher, we need an on/off switch. You need to carefully select a location that would be both convenient and practical for the installation.
You can make its home on the control panel or the mounting surface. But make sure you follow the manufacturer’s instructions to ensure its proper wiring and installation.
Step 9: Complete the Wiring to the Supply and Actuator
With every wire connected, the creation should begin to come alive by now. The power supply and the linear actuator are expected to form a connection to the DPDT Relay and the on/off switch.
With each connection secure and insulated, you’ll have an efficient and functional machine.
Make sure you double-check the wiring and follow the schematic religiously. Avoid any missteps that could jeopardize the vision of the crusher.
Step 10: Test the Linear Actuator Recycling Crusher
Finally, it’s time to put the crusher to some test. Connect the power supply, flick the on/off switch, and the linear actuator should spring to life. The limit switch, which should be triggered by its faithful rail, is expected to guide the actuator’s motion with precision and purpose.
That’s how to build a DIY linear actuator recycling crusher.
What Materials Can You Crush in This?
The recycling crusher can be used to recycle materials such as:
- Beverage cans
- Canned food tins,
- Aerosol cans
- Caps and closures
- Plastic bottles
What are the benefits?
There are several benefits of having this recycling crusher. These are direct benefits which you get and the contribution you’re making to the world at large:
Enhanced Crushing Efficiency
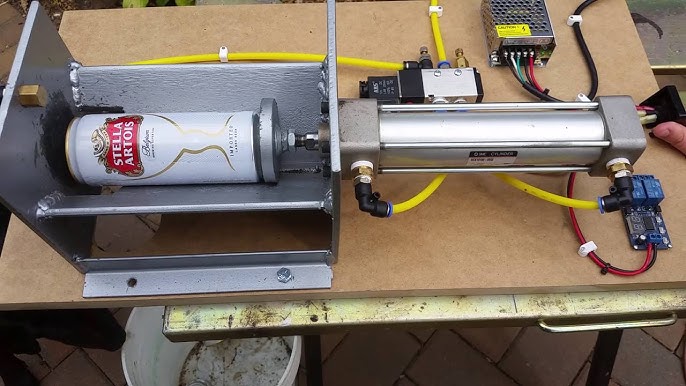
The linear actuator design typically used in recycling crushers makes this technology more efficient. It compresses wastes into compact recyclables.
Depending on how sturdy the engineering is, the crusher is expected to crush consistently. Also, it can crush various types of light materials, from aluminum cans, tins to closures and plastic bottles.
Automation and control
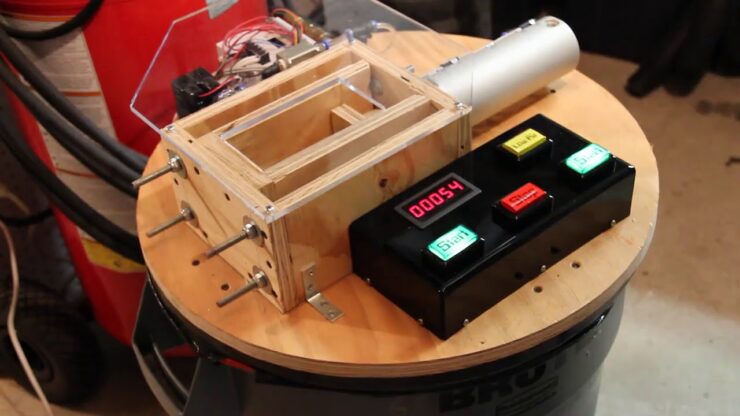
You can use sensors such as microcontrollers in this crusher. Depending on the type, these can, for example, allow the system to detect cans in the queue and crush them almost fully automatically.
Some also let you have a control board with a screen interface mounted. There’s also a Speed Controller, which enables you to control the speed of the actuator.
These sensors and microcontrollers provide accurate monitoring and real-time adjustments. So, they enhance control, efficiency, and performance.
Durability and reliability
When crafted with robust materials and you use a sturdy rod actuator, this crusher can ensure continuous operation. Also, it’ll be unfazed by crushing demands.
It’s a trusted companion in recycling among DIYs. It offers a lasting solution for waste management.
You’re promoting sustainability
Over 70% of the aluminum can materials used today are recycled into new products. So, by owning and using this crusher, you’re helping to keep the environment sustainable.
Besides, the process for the recycling of aluminum material, for example, requires 95% less electricity than what is required to produce new aluminum from natural resources.
Possible Limitations
While this system has obvious benefits, there are some limitations you should know about before starting the project.
Actuator Failure
The actuator in a recycling crusher is like any mechanical component. It can malfunction, break down over time, and be less efficient. Therefore, we recommend regular maintenance and monitoring. Also, don’t hesitate to replace any failing component in time for safety reasons.
Overloading
Overloading the crusher system beyond its capacity can also cause an actuator failure or even cause an overheating system. So it’s often advisable to load the crusher minimally and be around it while it works.
How to Use a Recycling Crusher
Now that your crusher is fully assembled (or let’s assume it is), here’s a quick guide on how to use it:
Prepare the Materials
Start by gathering all the materials you wish to recycle – light aluminum or plastic. Remove any odd components. If you’re working on aluminum, plastic caps and non-ferrous metals are unwelcome guests. Separate them.
If you’re recycling PET plastics, ensure the tiniest bit of PVC doesn’t get in, and vice versa. This can cause problems along the line during manufacturing.
Load the Crusher
Now load the device with the recycling materials. This has to go into the dedicated loading bay. Exercise caution not to overload the machine. Balance is paramount.
Crush
Now it’s time to activate the crusher according to its designated mode, whether through a flick of a switch.
In the case of the DIY crusher shown earlier, start by connecting the power supply, flick the on/off switch, and the linear actuator should start working.